Guides
How to Replace an RV Converter or Charger, Start to Finish
Researched from published standards and manufacturer specifications. Updated .
Quick answer
A converter replacement is usually triggered by one of two things: the existing converter has failed outright, or it is charging fine but applying the wrong profile for a lithium battery that just went into the rig. Both situations lead to the same job, pulling one converter out and wiring in another, but the sizing and profile questions differ slightly depending on which situation you are in.
This guide covers how to tell whether a converter actually needs replacing, how to size the replacement, the WFCO deck-mount pattern that makes many swaps simpler than expected, and the order of operations for the swap itself. It assumes basic comfort with 12V wiring; if you are also touching the AC side of the panel, treat that as separate, higher-stakes work.
How do I know my converter actually needs replacing?
Three symptoms point at the converter specifically rather than the battery or the wiring around it. First, the battery never reaches a full charge after days connected to shore power, which on a lithium bank usually means the converter is applying a lead-acid profile that cuts off well below the voltage lithium needs to reach full. Second, the converter's cooling fan runs constantly or the unit runs noticeably hot to the touch, which often precedes an outright failure. Third, 12V loads dim or behave erratically only while plugged into shore power, which can mean the converter's output has become unstable even though it is still producing some voltage. A converter that has simply stopped producing any output at all, checked with a multimeter at its DC output terminals while connected to shore power, is the clearest case and needs no further diagnosis before replacement.
Why won't a stock converter charge a lithium battery to full?
A lead-acid converter is built to stop bulk charging and drop to a lower float voltage once it reaches a voltage that fully charges lead-acid, roughly 13.6 to 14.4 volts depending on the model. LiFePO4 needs a higher absorption voltage and a different charge curve entirely to reach its own full charge point, and a converter that never applies that curve will settle the lithium bank at a partial state of charge indefinitely, even though the converter itself is working exactly as designed for the chemistry it was built for. This is not a fault in the converter, it is a mismatch, and it is the single most common reason a converter gets replaced during a lithium conversion even when the old unit still works fine on a lead-acid battery.
What size converter do I actually need?
Converter amperage roughly sets how fast the house battery refills from shore power or a generator, not how much total capacity the battery holds. 55 amps is the common size for a single-battery bank in this catalog, and a larger bank or a household that wants a faster recharge window can look at higher-amperage units, though 55A covers the majority of single and double battery builds. Sizing a converter meaningfully larger than the battery bank's charge acceptance rate does not damage a well-built lithium battery, since the BMS regulates intake, but it also does not speed up charging past whatever the battery itself can accept. A rough planning check is to compare the converter's rated amps against the bank's nominal amp-hours: a 55A converter refilling a 100Ah bank from a meaningful deficit takes a few hours, while the same converter on a 400Ah multi-battery bank takes proportionally longer, which is worth knowing before assuming any 55A unit refills any bank overnight.
What is the order of operations for the swap?
Turn off the AC breaker feeding the converter and disconnect the RV from shore power and any generator before touching anything. Disconnect the house battery next, negative terminal first, so the DC side is also de-energized while you work. Photograph or label the existing wiring before disconnecting it: the AC input, the DC output to the battery, and any low-voltage sensing or fan wires specific to the model. Remove the old converter from its mount, noting whether it uses a WFCO-pattern deck-mount bracket, since matching that bracket avoids modifying the mounting surface. Install the replacement using the same wiring points, reconnect the battery positive then negative, then restore the AC breaker and shore power connection last. Verify the new converter's charge voltage at the battery terminals with a multimeter once power is restored, and confirm it matches the profile your battery chemistry actually needs before considering the swap finished.
How do the common converter replacements compare?
The table below compares the converters in this guide's picks on the factors that actually differ between them: charge profile, mounting and where each one fits best.
| Converter | Charge profile | Mounting | Best for |
|---|---|---|---|
| VEVOR 55A | Adjustable 13 to 16.5V range | Universal deck mount | Budget lead-acid or basic lithium |
| PowerMax PM3-55LK | Dedicated lithium curve | Universal deck mount | A straightforward lithium conversion |
| PowerMax PM4-55A | Dedicated lithium curve | Universal deck mount | A step up in build quality on the same lithium platform |
| WFCO WF-9855-AD-CB | Auto-detect lead-acid or lithium | WFCO deck-mount pattern | A slot-in replacement for a factory WFCO bay |
Published standard Source: Charge profile and mounting details from manufacturer listings for the specific products in this catalog.. Confirm your existing converter bay's bracket pattern before ordering; not every bay uses the WFCO pattern even on trailers that ship with a WFCO-brand converter.
What happens if you skip checking the charge profile before buying?
Buying strictly on amperage and price, without checking whether the unit actually applies a lithium profile, is how a rig ends up with a second converter that also cannot fully charge a lithium bank. Not every converter marketed as lithium compatible applies a full lithium absorption and float curve; some simply widen the adjustable range without a dedicated lithium mode. Read the specific charge voltage the converter settles at once it reaches what it considers a full charge, and compare that to your battery manufacturer's recommended absorption voltage, before assuming compatibility from a listing title alone.
What tools and supplies does the swap actually take?
A converter swap is mostly hand-tool work: a Phillips and flathead screwdriver for the mounting screws and terminal connections, a multimeter to verify voltage before and after, and a set of properly sized ring terminals if the new converter's output leads differ from the old one's connector style. Keep a permanent marker or masking tape on hand to label each wire as you disconnect it, since even a simple deck-mount converter has more than one small gauge wire beyond the main AC and DC connections, including a remote panel connection on some models and a cooling fan lead on others that is easy to forget when reassembling from memory a day later. A crimping tool rated for the wire gauge on the existing DC output cable is worth having if the new converter uses different terminal lugs than the old one, rather than forcing an ill-fitting terminal onto a lug it was not sized for. Dielectric grease on the DC terminal connections is a small step that reduces corrosion in a battery bay that sees moisture, and it costs nothing to add during a swap that already has the terminals apart. Confirm the AC breaker feeding the converter is rated appropriately for the new unit's AC input current before restoring power, since some higher-amperage converters draw enough AC current to warrant checking the breaker size rather than assuming the old breaker automatically covers the replacement. None of this requires specialized RV tools beyond what a basic home electrical toolkit already includes, which is part of why a converter swap is one of the more approachable DIY jobs on an RV electrical system, provided the de-energizing steps earlier in this guide are followed in order.
De-energize both sides before working on a converter. Disconnect from shore power and any generator, and disconnect the house battery, before removing or wiring a converter. A converter sits between two live systems and can carry dangerous voltage from either side even when the other is switched off.
Which converter to buy
Check the mounting bracket in the existing converter bay before choosing a replacement. A WFCO deck-mount slot accepts a like-for-like WFCO unit with the least rewiring, while an open bay gives more freedom to choose on price and charge profile alone.

VEVOR 55A RV Converter with 4-Stage Charging
$64.84A 13 to 16.5 volt adjustable charge range covers a basic lithium or lead-acid profile at the lowest price point in this lineup.
Best for: A budget converter replacement.
Check price on Amazon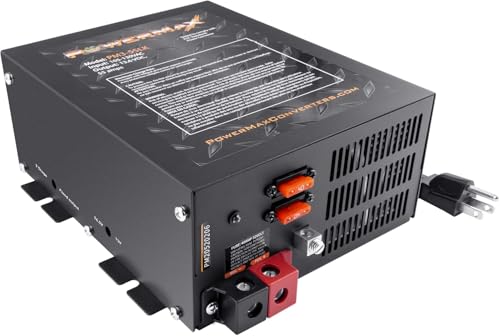
PowerMax PM3-55LK 55A Converter, Lithium
$133.00Built specifically around a lithium charge curve rather than an adjustable range, for a rig converting to LiFePO4.
Best for: The converter swap that has to happen with a lithium conversion.
Check price on Amazon
PowerMax PM4-55A 55A Converter, Lithium
$143.00A step up in build quality within the same PowerMax lithium lineup, for an owner replacing a unit that failed early.
Best for: A build where the charge voltage has to be set exactly.
Check price on Amazon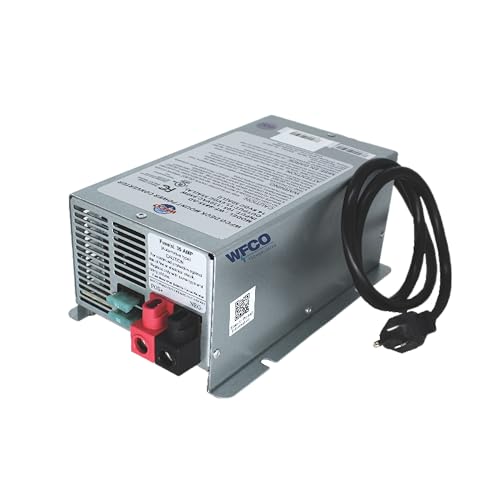
WFCO WF-9855-AD-CB 55A Converter/Charger
$248.99Matches the deck-mount bracket used across many factory-built trailers, plus auto-detect switching between chemistries.
Best for: A direct drop-in replacement in a WFCO power center.
Check price on AmazonFrequently asked questions
- How do I know if my converter is the reason my lithium battery never reaches full charge?
- Check the voltage the converter settles at once charging stabilizes, using a multimeter at the battery terminals. A converter applying a lead-acid profile will settle around 13.6 to 14.4 volts, well below what a LiFePO4 battery needs to reach true full charge, while a genuine lithium profile pushes higher during absorption before dropping to float.
- What size converter do I need for a single lithium battery?
- 55 amps covers most single-battery lithium banks in this catalog and is the common default size. A larger multi-battery bank or a preference for a faster recharge window can justify a higher-amperage unit, but the battery's own BMS still limits how fast it accepts a charge regardless of converter size.
- Can I just widen my existing converter's voltage range instead of replacing it?
- Only if the converter has an adjustable range and a genuine lithium mode, not just a wider lead-acid range. Some converters marketed as lithium compatible only widen an existing lead-acid curve rather than applying a true lithium absorption and float profile, which still undercharges the battery even after adjustment.
- Do all RV converters use the same mounting bracket?
- No. Many trailers use a WFCO-pattern deck-mount bracket, which accepts a like-for-like WFCO replacement with minimal rewiring, while other bays use a universal or brand-specific mount. Check the existing bracket before ordering a replacement to avoid needing to modify the mounting surface.
- Is it safe to leave the house battery connected while replacing a converter?
- No. Disconnect the house battery, negative terminal first, along with disconnecting shore power and any generator, before removing or wiring a converter. The converter sits between two live systems, and leaving either connected during the swap risks a short or a shock.
- Will a bigger converter charge my battery faster no matter what?
- Only up to the point the battery's own BMS or internal chemistry can accept. A lithium battery's BMS limits how much current it will accept regardless of how much the converter can supply, so oversizing the converter well beyond the battery's charge acceptance rate does not meaningfully speed up charging.
A word on safety. Disconnect shore power, any generator, and the house battery before removing or wiring a converter. Confirm the replacement's actual charge voltage at the battery terminals once installed, rather than trusting a lithium compatible label alone.